
Orca Slicer Elephant Foot Compensation and Precision Settings
Orca Slicer elephant foot compensation shrinks the first layer inward so the flared bottom edge, called elephant foot, prints at the right size. It sits in the Precision group with other settings that control dimensional accuracy: gap closing radius, resolution, arc fitting, X-Y compensation, precise wall, precise Z height and polyholes.
You find all of them in Process > Quality > Precision. This guide explains each one, lists the base defaults from the OrcaSlicer v2.5.1 source, and shows how to measure and correct real parts. It is part of the Orca Slicer wiki.
What is elephant foot in 3D printing?
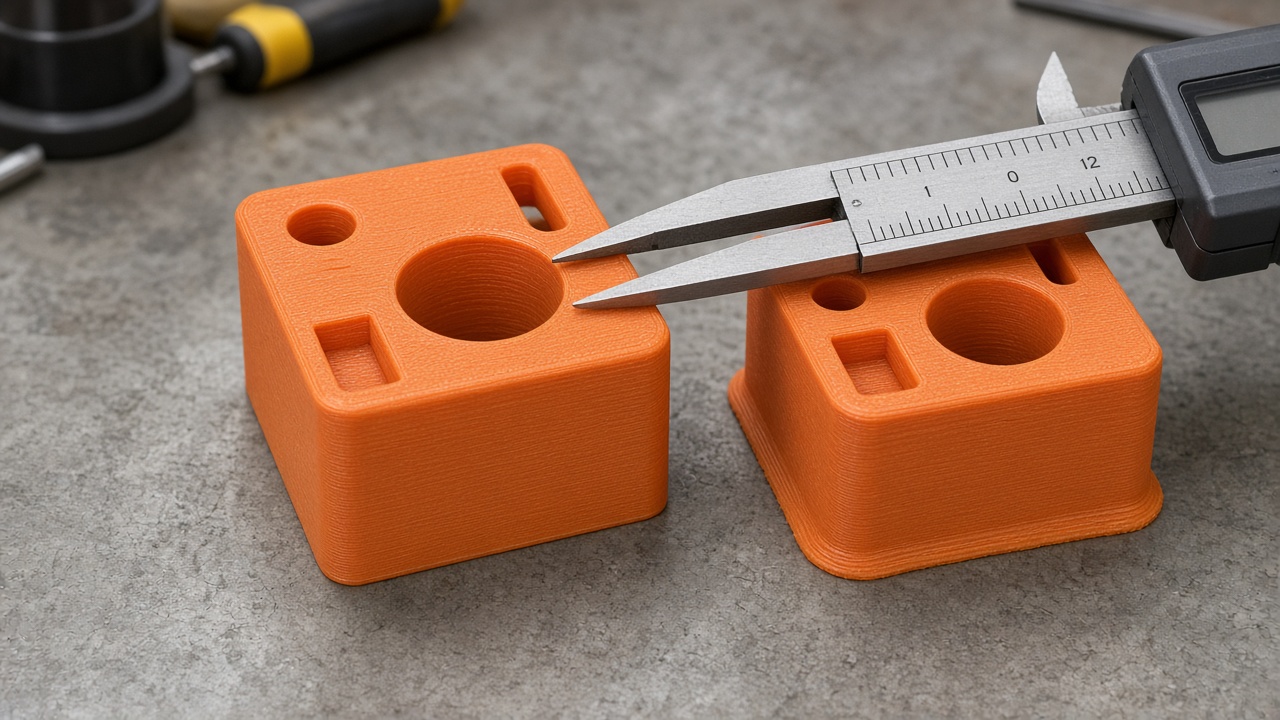
Elephant foot is a bulge on the first few layers that makes the bottom of a part wider than the rest. Four things cause it: the weight of the layers above, thermal expansion, a bed that runs too hot, and a nozzle set too close to the bed. The bulge ruins press fits and makes parts sit badly against each other.
Fix the cause first. Level the bed, set the right Z offset and avoid an overly hot bed. Then use compensation to remove what remains.
How does elephant foot compensation work?
The setting Elephant foot compensation shrinks the outline of the first layer by the value you enter. The base default is 0 mm, which turns the feature off. Elephant foot compensation layers spreads the correction over several layers. The first layer gets the full value and each following layer gets a smaller share, falling in a straight line to zero.
Take a value of 0.25 mm over 2 layers. Layer 1 shrinks by 0.25 mm, layer 2 by 0.125 mm, and layer 3 prints at full size. Over 5 layers, the steps fall to 0.2, 0.15, 0.1 and 0.05 mm before reaching zero. Orca applies the correction only when the part sits directly on the plate, and it skips it when you print on a raft.
Elephant foot compensation density
This option lowers the internal solid infill density on the compensated layers above the bottom layer. The base default is 100%, which disables it, and the range runs from 50% to 100%. It helps when heavy first layer squish causes ripples or nozzle scraping on the early solid layers. The official documentation suggests starting at 80% to 90% with 1 to 2 compensation layers.
How to set elephant foot compensation in Orca Slicer
- Print a test part. Print a 20 mm calibration cube or any part with straight vertical sides, with elephant foot compensation at 0.
- Measure the flare. Measure the width across the first layer and across a layer higher up with calipers. The difference is your total flare.
- Enter the compensation. Open Process, Quality, Precision and enter the measured difference in Elephant foot compensation, in millimetres.
- Set the layer count. Set Elephant foot compensation layers to 1 for a mild flare, or 2 to 3 if the flare spreads over several layers.
- Reprint and compare. Print the part again and measure. Adjust in steps of about 0.05 mm until the bottom matches the walls above.
Many users land between 0.1 mm and 0.3 mm on a well-levelled printer. A value much higher than that often points to a Z offset or first layer problem. Check the first layer section of our calibration guide before you push the number up.
Why is my brim detached when I use elephant foot compensation?
The preview shrinks the first layer but leaves the brim at its normal position, so you see a gap. On a correctly calibrated printer the squished first layer spreads back out and touches the brim. If the brim separates on the real print, lower the compensation or set Brim-object gap to 0. Newer versions add a Brim use EFC outline option in the brim settings that places the brim against the compensated outline.
What do the other precision settings do?
The table lists every setting in the group with its base default. Your printer profile may change some of them.
| Setting | Base default | Purpose |
|---|---|---|
| Slice gap closing radius | 0.049 mm | Closes tiny cracks in the mesh while slicing |
| Resolution | 0.01 mm | Simplifies model contours before path generation |
| Arc fitting | Disabled | Writes G2/G3 arcs instead of many short lines |
| X-Y hole compensation | 0 mm | Grows or shrinks holes |
| X-Y contour compensation | 0 mm | Grows or shrinks outer contours |
| Elephant foot compensation | 0 mm | Shrinks the first layer |
| Precise wall | On | Removes overlap between outer and inner wall |
| Precise Z height | Off | Matches the final height to the model |
| Convert holes to polyholes | Off | Prints round holes as polygons |
Slice gap closing radius
Orca fills cracks smaller than twice this radius when it slices the mesh. It rescues models with small gaps between triangles. Keep it low, because large values also close real detail and lower the print resolution.
Resolution
Resolution simplifies the outline of each layer to avoid thousands of tiny moves. Smaller values keep more detail and slice slower. Raise it only when large, dense models slice slowly on a weak computer.
Arc fitting
Arc fitting replaces runs of short straight G1 moves with G2 and G3 arc commands. You can pick Disabled, Enabled, or Sparse infill only. The main benefit is a smaller G-code file. It does not improve print quality, and arcs can even slow a print because the firmware splits them back into lines. The official documentation recommends Disabled for Klipper printers. Arc fitting also turns off when you enable extrusion rate smoothing, and your firmware must support G2 and G3.
X-Y hole compensation and X-Y contour compensation
Hole compensation changes the size of holes. Positive values make holes larger and negative values make them smaller. Contour compensation does the same for the outer outline. Use them for small corrections when parts do not assemble, after you calibrate flow and shrinkage. Measure a test hole, and if a hole prints too small by 0.2 mm in diameter, a hole compensation of 0.1 mm adds roughly 0.1 mm per side.
Precise wall
Orca, like other Slic3r-based slicers, overlaps neighbouring walls slightly. With Inner/Outer wall order, that overlap can push the outer wall outward and hurt accuracy. Precise wall sets the overlap between the outer wall and its inner neighbour to zero. Strength stays the same and dimensions improve. It comes enabled by default.
Precise Z height
A 20.1 mm tall part at 0.2 mm layers normally prints at 20.2 mm. Precise Z height adjusts the last few layers so the part ends at its true height. Orca warns that enabling it together with a prime tower can cause slicing errors.
Polyholes
Convert holes to polyholes prints round holes as polygons with a few flat sides. Flat sides print more reliably and holes come out closer to their true diameter. Three related options appear once you enable it: Polyhole detection margin, Polyhole twist (on by default, rotates the polygon every layer) and Maximum polyhole edge count (default 50).
In what order should I tune dimensional accuracy?
- Calibrate flow ratio and pressure advance.
- Set the first layer and Z offset, then add elephant foot compensation.
- Correct overall scale with the filament shrinkage settings if every dimension runs small or large.
- Use X-Y contour compensation for outer sizes, then X-Y hole compensation for holes.
This order keeps one correction from hiding another. Our Orca Slicer filament settings page covers the material side of accuracy.
Which settings work alongside precision?
Outer wall width affects the final size of every part, so read the line width settings guide next. Layer height changes how visible the first layer flare is, which the layer height page explains. For first layer adhesion on different plates, see multiple bed types in Orca Slicer.
Related guides: adaptive bed mesh
Frequently asked questions
Where is elephant foot compensation in Orca Slicer?
Open Process, Quality and scroll to the Precision group. Elephant foot compensation and Elephant foot compensation layers sit there in Advanced mode.
What value should I use for elephant foot compensation?
Measure the flare on a test print and enter the difference. Many levelled printers need 0.1 to 0.3 mm. Much larger values usually mean the Z offset sits too low.
Why is there a gap between my brim and the part?
The preview shows the shrunken first layer while the brim stays put. A calibrated first layer squishes back out to touch the brim. Lower the compensation or set Brim-object gap to 0 if the brim detaches.
Should I enable arc fitting in Orca Slicer?
Only if your firmware handles G2 and G3 well and you want smaller files. Arc fitting does not improve quality, and the official documentation recommends leaving it disabled on Klipper.
What is the difference between X-Y hole and contour compensation?
Hole compensation changes only holes inside the part. Contour compensation changes the outer outline. Positive values make the feature larger.
What does precise Z height do?
It adjusts the last layers so the printed height matches the model when the height is not a multiple of the layer height.
Print parts that fit the first time
Measure one test cube, set your compensation values and save them in your process preset. Download the latest Orca Slicer release so you get every precision option shown on this page.